Saturday, 13 November 2021

Guilford Court House 1781 - More 'Live Free or Die'

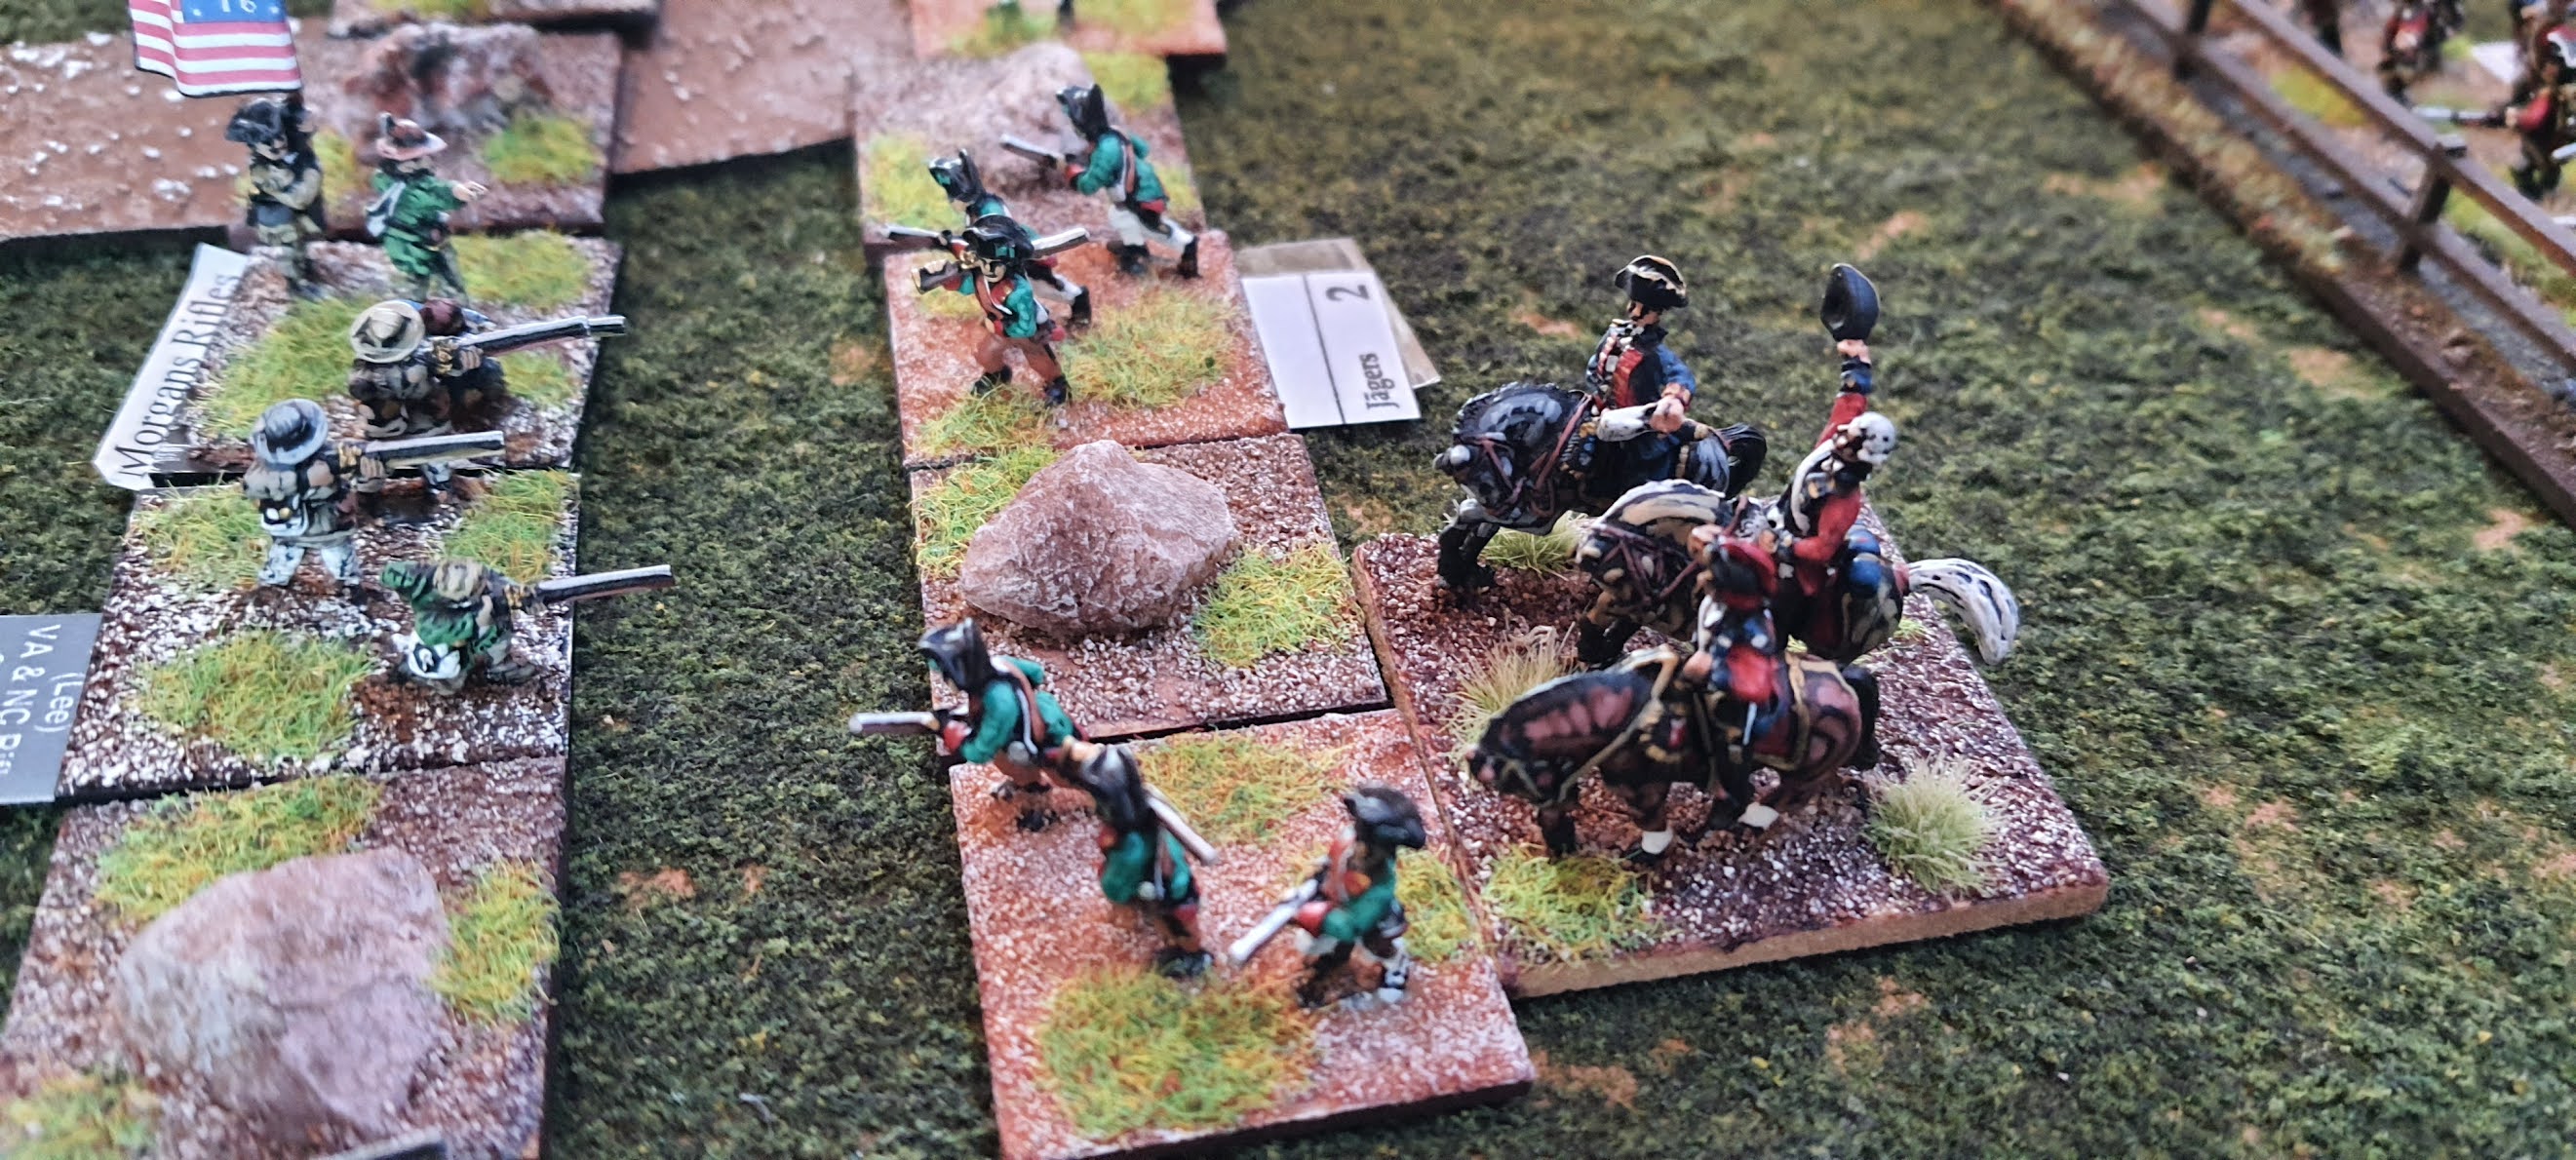
 Your roving reporter attended a game between the two Stephens, using Live Free or Die rules.

The battle was the ever popular Guilford CourtHouse: Cornwallis' Pyrrhic victory over the rebels in the south; the scenario again taken from the LFoD scenario book.


I still really like these rules. There are a few queries re. removal of DMZs (in rules as written - these are ALL removed once a base is removed - even the 'change'), and volley fire in woods etc, though I think some of the previous sensibilities with 'Loose File and American Scramble' clears up much of the concerns in that (1) the game is about morale, and managing it, rather than managing base losses and (2) the effectiveness of the units is also concerned with firing etc. such that close in work is both melee and firing, and longer range 'shooting' is thereby less effective, and hits morale rather than being immediately decisive - which reflects American and British tactics neatly, 

I think. LFaAS handles this in theory, and LFoD has not captured all of it perhaps, but that's an improved playability issue for LFoD I feel, and the game does play beautifully.


(Also see Dale's blog post, a great review, where a brief examination vs Slack Chowder is outlined.)

There are a lot of pics here...the minis and terrain are 15mm from the collection of the two Steves - which all looks superb. As our friendly neighbourhood google blogger control function is relentlessly mucking me about this evening, the pics are in reverse order duhhh. I left early, but understand that the Americans lost their commander, which affected what they were able to do later in the game, and that 10 turns wouldn't be enough to capture the objective, though victory is based on stand losses, so a British win.




Sunday, 7 November 2021

Brandywine online

We had another excellent meet last night, using Jonathan's hex based Field of Honor rules to contest two of the crossings at Brandywine (Knyphausen's attack). This is my second outing with these rules, and we had Steve and myself playing American and British again respectively, with Steve joined by Ken co-ordinating the American left, and Ivan controlling the Germans on the British left and (mad ...mainly because they were left in reserve) Scots.

Scots units administer the coup-de-grace at Brinton's Ford (Photo courtesy of Jonathan)

Needless to say, Scottish, German, early American, my completely mis-placed Nashville(!), and overwrought British accents were much in evidence...

The rules work seamlessly, and Jonathan's efforts around the table in terms of smoothing out queries, moving units and being 'where the fire is hottest' makes things go smoothly.

Highlights:

  • The Americans counterattacked/reinforced early at Chadd's Ford in order to scupper any thoughts the British might have had regarding a coordinated assault across the river, though British numbers eventually came to bear vs the resulting salient.
  • The British/German plan had been to feint against Brinton's, supported by heavy guns, with the main event against Chadd's; though the American counter proved that 'no plan survives first contact'.
  • American units at the fords would ultimately succumb to British charges/close action and pressure, with the final coup de grace from Scots units across Brinton's Ford.
  • Grant survived to fight another day, though news reports indicate that Mecklinburg and Greene were shot from the saddle, as was Stirn on the German side.

(No Scottish accents were 'murrderred' or misused in the making of this fine epic ...honest aye!   I can not however speak as to the dodgy use of polite British and extreme German semi-professional voice-work...)

Great set of rules for multi-player and large battles, again made all the more seamless by Jon's refereeing skills and camera prowess.

American units start to make crossings at Chadd's, in an attempt to reinforce Maxwell who is already well ensconced across the river.


Maxwell starts to bend at Chadd's while the focus on the American left is now centred on stopping the British well before they reach the river.

Americans pour across the ford, though the British are able to encircle the resulting 'bulge'

Germans simultaneously assault at Brinton's, being beaten back, then coming on again with the support of heavy guns on the hills

Matters become confused at Chadd's as British demonstrate against open flanks, forcing the Americans to make hard choices and sacrifice ground/units for time

Guns in position at Brinton's, with fresh Scottish troop being held back ...for just the right moment


After a series of British charges and close-range work in turns 7&8, they take Chadd's, with a view to exploiting the ground on the other side of the river

A great game, and we look forward to more very soon - also Jon's ACW variant (already used for Brawner's farm on Jon's blog) is being talked about for the next game.


Sunday, 31 October 2021

Princeton 1777, with 'Live Free or Die'

I've been itching to try these rules since they arrived from the US; developed by the guys at Little Wars TV, they are a 4 page approach at AWI, with a basis in Andy Callan's 'Loose File & American Scramble' and lots of pertinent scenarios covering most of the events of the war.


Aimed at 1"x1" bases (with 10 or 15mm - see the Little Wars TV Brandywine episode for excellent coverage), I upped the scale (and thereby table size) to suit my 25mm stuff (on 1.5" square bases). It worked beautifully, although I did end up using every single American AWI base that I own for this scenario - I must paint more figures.


Highlights:

  • The rules come in a magazine format book, though you can of course buy the pdf. Proceeds help the American Battlefield Trust. This war has always been a fascination of mine - there are many ironies at work...with subsequent influences felt across the C18th and C19th.
  • The format follows Andy C's LFaAS in the main, but clears up much of the issues where those rules did not focus on the detail. Granted, with 4 or 5 pages of rules, there will be queries, but solutions seemed to be relatively straightforward, and problems were solved intuitively.
  • Turn sequence covers : Command, Initiative, Leaders, Charges, Firing, Moving, Melee and Redress Lines. A more traditional sequence you might think, but you have to be careful how (1) you spend your command (resource), (2) where you place your leaders (who are great when attached but obviously at risk) and (3) how fragile militia or class 3 or 4 troops can be - especially so in the face of 1st or 2nd class troops.
  • Units take 'Demoralisations' (DMZs) which ultimately takes bases away after 5, but more pertinently, create morale rolls and potentially force units back, in turn potentially demoralising forces in their retreat path. This is not as complex as it sounds and works pretty seamlessly. This is the real meat of the resource management aspect. You quickly get a sense of units that can take more DMZs and those who are under threat of capitulation ...and you can't do everything you want to...
  • Firing is d6 based, and there is a distinct difference between 'hasty fire' and moving and 'volley fire' (twice the dice) and thereby not moving - great period flavour here done seamlessly, without lists of modifers. This can make 1st class British units fairly powerful, and by no means a glass hammer, unless confronted/outnumbered by continentals.
  • British charges can be pretty devastating in the right circumstances.
  • There is no arbitrary 2D6 roll for unit activation...

Everything works! Key to this however, is that the guys have really kept the spirit and flavour of the AWI in these rules.  

 The scenario was from the main rulebook: Princeton 1777. Scale is 50 men to a base.

  The British could win if they could retain control of one of the road exits. This would not be easy as American pressure would become increasingly heavy as the turns wore on.


Early American moves in the centre

'Here we go again Zeke'

Some of the British infantry are 1st Class - with devastating vollies, especially so if combined with a leader

An early charge from British cavalry against skirmishers is indecisive

Here they come...in the British centre

The British left remains tantalizingly open...

British 17th foot remains stoic throughout the day

Early signs of Hitchcock's Brigade - reinforcements on turn 3, and keen to do something on the British left flank

The centre bears the brunt of the early American attack


American flanking action starts to develop


On the American left, reinforcements are starting to pour onto the field in column, but it's getting closer to turn 10. Can the British hold?

Washington takes centre stage, in an attempt to hold the British centre in place, with militia ,,,he is wounded twice.


Mercer's skirmishers close again. Actually, we forgot about their extra range at one point, from rifles...

American columns closing to one road exit. They'll undoubtedly take it. If Washington can do something in the centre, the Americans could win the game.

Americans also now seriously threatening the British left.


The British hold and force the Americans back in the centre. It's late in the game, and they still hold the road to Princeton ...

The flank will ultimately cave to American pressure, but perhaps not before game turn end

Washington and Mawhood both wounded with fighting in the centre


American columns will take one objective...


American militia forced back in the centre. British firepower is devastating

The flank action hotly contested ...with the last British unit entering the field


A charge on the British right - simply to deter any riflemen and oncoming Americans...

...though they have now captured the road to Trenton ...and are turning to the other British flank...

...but by game turn 10, the British have held on, and inflicted more losses than they have sustained.

A great set of rules, and well supported with scenarios which take on all the major engagements. More from these rules soon. (and yes...must paint more figures - especially if I want to do Germantown)