Saturday 22 December 2012

Game 6 - The Battle of Marengo, 1800

The pinnacle of one of Napoleon's most famous strategic campaigns, and yet very nearly a complete disaster, Marengo represented a wasted opportunity for the Austrians. The Austrian centre collapsed in the wake of a French cavalry charge. Would history repeat itself?

The old version of GDW's Volley and Bayonet was used, complete with the scenario in the book. We hope to use the newer version at a later date (perhaps with the same scenario).

Figures are 20mm plastic and lead. Various manufacturers including Airfix, Hat, Italeri, Revell, Newline. 2/3 scale (2"x2") bases were used with appropriate movement and range adjustments. Table was 6'x4'.


The French right was weakly held, so much so that several Austrian brigades were able to secure the flank - or were they (?)


The centre would prove more problematic. Crossing the bridge in dense columns, with one eye on French movements, meant that the centre quickly became a morass of disorganised brigades.

 Austrian cavalry focused on the French left, in the hope of defeating it early.

Immediate action in the centre.

French cavalry were quick to respond.
 
Murat and Kellerman leading their first charge of the day.

The Austrian centre still confused.

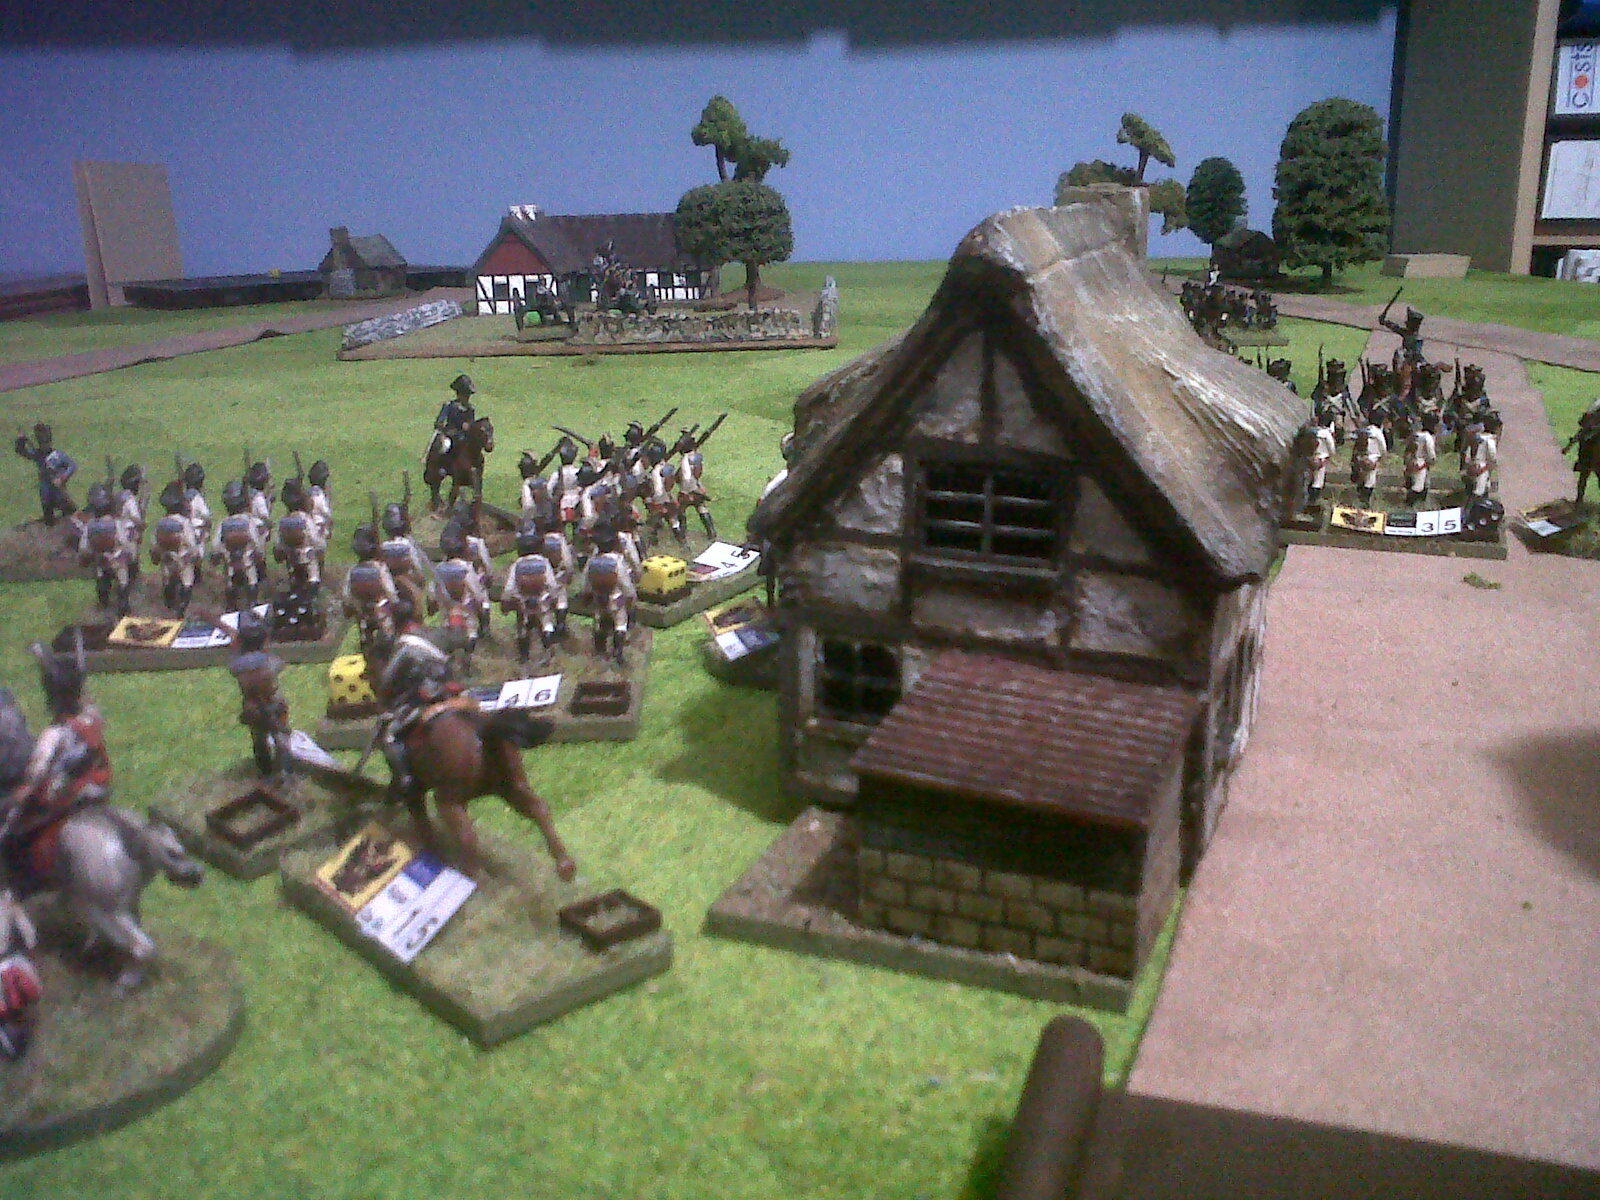
Note the little dice on the 2/3 scale bases. Quite good markers - especially so for casualties.

Inevitable melee. Always a dangerous proposition for both sides in the V&B rules.


French units quickly plugged the gap between the marsh and Marengo itself, where Austrian skirmishers were attempting to gain a foothold. Had the Austrians focused more of their main infantry body here, instead of trying to force it across a narrow bridge, matters in the centre might have been very different.

On the Austrian left, the flank was slowly being secured, despite the approach of French reinforcements.


While on the right, a massed cavalry action was developing.


Shots of the centre and left. By 1pm, the Austrians had secured a foothold across the river, but were becoming bogged down.


Despite Austrian confusion, they were beginning to gain the upper hand in the centre, their large numbers having more staying power than the rapidly mustered force of the French.


There remained one option. The French retreated and regrouped. having lost Marengo, they would make any attempts to take San Guiliano very costly for the Austrians however.


Given confidence by their securing of thecentre, and despite some doubt on the flanks, the Austrians attacked the new French lines head on - bringing them nicely into range of the French artillery batteries which had sat in the vineyards to the east for most of the game.


 Some shots of the dice markers in action, combined with some mini 'poms poms'. Green is 'stationary', red or yellow is 'disorder', and black indicates casualties - the number on the black dice indicating hits taken.

Murat, having got the better of the Austrian flank, leads a cavalry charge 'around' their rear to secure his left - straight into the scattered remnants of the depleted Austrian flanking force. Vive L'Empereur!


By game end, the Austrians have nothing left to take their remaining objective with, and the French win the day! By 5pm (turn 9), it is all over. Four Austrian divisions have retreated or collapsed and only Marengo is held.

Volley and Bayonet is a wonderful set of rules, although there are several non-intuitive elements which have to be remembered (morale in contact, retreat vs rout etc.). Experience with these nuances makes them second nature however. More V&B to follow, between bouts of Force on Force and the new WW2 game 'Blood & Guts'.

Oh yes, and finally, MERRY CHRISTMAS to all.

Saturday 17 November 2012

Vive L'Empereur !

Volley and Bayonet game delayed, though preparations continue. Another shot to whet the appetite.

Sunday 4 November 2012

Forces Assemble

In preparation for the Volley and Bayonet game, French and Austrian forces begin to assemble. Those with keen eyes might note some very old Airfix French in the mix here. Some newer Hat figures on the right though. We'll be using base labelling for brigade identification and the little dice and square combos for casualty and status markers. Let's hope it's not too fiddly.
(We'll also be using late French figures for the early battle of Marengo...I hope no one complains!)

Sunday 21 October 2012

Game 5 - Turkey Shoot

Another scenario from the Ambush Alley ruleset. A mobile sniper team is escorted into position by a marine recon squad, with LVTP 7 is support. In game terms, the sniper team must 'sit' on the roof of the target building, engaging offboard targets for three turns, then be escorted off table.

We found this one very tough on the insurgents, who couldn't get the right numbers in the right position, for a concerted attack. A D10 quality dice on the part of the regulars, and very lucky casualty rolls, made a real difference here.


The Marine APC moves straight down the main road.

Marines came under immediate fire as they disembark, with one KIA in Team Bravo.


Bravo were caught on the wrong side of a wall as they came under further fire from the nearby rooftops. Amazingly, despite taking three further casualties, only three scratches were taken. (Gobin was amazed, Faulkner-Fitzwilliam...more amazed!)


Pressure begins to mount as marines are taken under fire by massing enemy. A combination of overwatch and those lucky d10s, keep the enemy at bay however.

As the sniper team get to their position on the target building, ready to engage targets in the nearby...bookcase!


 A UAV onhand to photograph the developing firefight. 


A lull in the battle allows Alpha to gain overwatch position on the target building. The sniper team spends its three turns engaging, then turns to help the marines, by taking out insurgent reinforcements who are about to outflank Bravo.


The resulting pinning of insurgent units and containment of reinforcements allows the marines to use fire and movement to move from building to building, as the snipers and Team Alpha leave with the APC. An excellent facet of the game mechanics here, we saw a combination of movement and overwatch permit the remaining fire teams to move up the street with mutually supportive fire. The insurgent reinforcement schedule simply could not put the right numbers in the right place at the right time. Had Bravo  not made those lucky recovery rolls, or been hit by another unit, it might have been a very different story.
Great game.

Next time...Private Contractors in Dawala. I'm sure nothing will go wrong ? (Alternatively, we might have a Volley & Bayonet game...decisions, decisions.)


Sunday 7 October 2012

Game 4 - Contracting Trouble

This scenario first appeared in the precursor to 'Force on Force' back in 2007. This was before Osprey started publishing the rules. The original 'Ambush Alley' focused on the mechanisms from an 'asymmetric' viewpoint, and would later develop into FoF. Being completists, we want to try out the original rules before moving on to the Osprey rules and scenarios. We also want to develop our own very specific scenarios, for a somewhat neglected side of modern conflict (watch this space).

So, all in all, we're a little behind the curve with Ambush Alley/FoF game - time to catch up. The first thing that struck us was the reaction system. Being used to traditional style systems is a real stumbling block here. By the second run through however, we were starting to get to grips with things. By that point, we were only neglecting basic elements like movement and morale(!), though firing and reaction mechanisms were becoming intuitive.


Marines move into the zone to rescue the contractors...

...who are stuck, wounded and running low on ammo.


 RPGs were prevalent, and managed to pin down the marines for far too long.

And pockets of insurgents also didn't help. It took us the first game to work out how the interrupt sequence both worked, and could benefit both sides - in different ways.

...as marines dash from cover.

RPGs make a mess of things. (Nice touch here where insurgent leaders could make more rapid decisions than the 'troops'. It will be interesting to see the regular vs regular engagements in FoF when we make it that far).


We had a few issues with movement and firing...

2nd go at the same scenario and the marines go up the left flank.

Finding an overwatch position on top of the hotel turned out to be very helpful, and allowed Bravo team to command the battlefield (although again, we missed a few quality checks that they should have made before getting the drop on the insurgents).

They even got away after the contractors had been secured by Team Alpha.

All in all, we still have some rules to sharpen up on, but it's easy to see the appeal and the unique approach of the game. We also got two games in, in less than 3 hours, which has to be a record. More to come from this one.