I always wanted to play this one with the scenario in the original ‘Black
Powder’ rules, but I’ve been reading Volley and Bayonet with such interest in
recent weeks, combined with Jeff Glasco’s amendments for smaller scales, that I’ve
got that V&B bug again.
The scale in this instance is ‘Battalion Scale’ – reduced slightly from
the smaller Regimental (smaller again when compared with Napoleonic scale say) in the original V&B rules
book – where a strength point for AWI was 200-250 men.
In this instance we have:
- Musket Range 2” (1”= 50 yards) (Having fired one of these things though, 100yards is a bit optimistic – if you are intent on hitting anything ;) )
- One Strength Point = 100 men
- 30 mins per turn
- 2 guns per strength point.
To be honest I wasn’t sure how it would play with the changes. However, the move from a larger scale battle was quite seamless. The
system plays equally well at both levels of battle - lent credence by the two genius design features of 'exhaustion' and 'stationary' fire. Granted, as with all rules, there are some
caveats and prices to be paid, but we see that in most cases. (It will be very
interesting to contrast gameplay with one of the Piquet variants when I get
around to it).
The Battle
I didn’t use the Black Powder map, and instead scaled down from the map
in W.J.Wood’s Battles of the Revolutionary
War. I took the OOB from there and checked with the seminal work by Greg Novak (Campaign Book #7 – The War of Independence
in the North – the Ulster Imports version, though of course, this has
recently been re-published). Strengths are of course
slightly larger than normal, and this played out beautifully and resulted in a
very tense game.
Giving a nod to history, we rolled randomly (4-6 on d6) as to whether
Riedesal and Fraser would arrive/grant reinforcements to the battle in the
centre, and whether Gates would release Learned’s brigade to the battle. This
random element proved pivotal to the whole battle as we will see.
Rather unhistorically, it would be Riedesel, rather than Fraser, who would be slow to move with fresh troops. And as for Gates, the man couldn't have been nicer to old Benedict Arnold. Clearly, dark forces were at work...
(OOBs at end of pics)
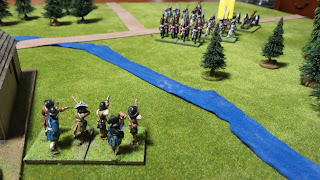
Morgan's men give fire from the woods. Indians point out the obvious (we get a lot of that later too...)
Hamilton moves up...
...and Fraser rolls well and starts to reinforce in turn 2, defying history.
Riedesel stops to...ponder.
Hoping for reinforcements early in the game, Arnold moves troops straight toward Fraser on his left, while pushing Poor's men to attack in the centre, keeping the militia in reserve (a damned good idea in V&B).
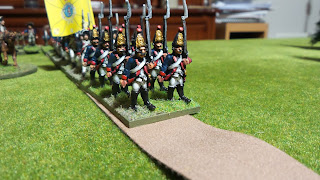
Fraser starts to deploy on the right, in expectation of an American assault, He outnumbers them, this should be easy...?
A protracted firefight in the centre, trading musket vollies, which would wear down both sides considerably. Who would break first?
Hamilton uses his other battalions to deal with the light elements in the woods.
...even as Gates, who is apparently in a good mood, releases reinforcements to Arnold early in the game.
View from the American left - Fraser's position on the road, American militia in reserve, firefight in the centre.
After a number of turns, where the American musketry tells, while the British suffer, converged Grenadiers are shot away, without even getting a chance to charge and use shock bonus !!!
...while in the centre, the Americans hold on.
Brunswickers hold their position (the dice were very unkind here), watching as their allies bear the brunt of American fire..and slowly, slowly, the centre is being outflanked.
British moves threaten to outflank the American centre after Morgan's men flee...
...though Learned has found a way through to the British lines.
'The general said we were gonna hold this here position Zeke, so that's exactly what we're gonna do...'
The centre holds...still
Still confident, Fraser charges on the American left...and fails miserably, leaving the flank open, and forcing the brigade into exhaustion...
The centre too is exhausted and felled by accurate American musketry.
Remaining troops being flanked and forced into supportive positions, but they are worn down.In fact, two British brigades suffer morale collapse in the same turn (rolling two 1s).
Riedesel moves by 2pm, but it's too late, far too late. The battle is over.
The endgame. Americans control the left flank. Though one brigade is exhausted in the centre, they are about to be reinforced by Learned's men (who haven't fired a shot) approaching from the east. Though Riedesel is closing, there is little that he can do.
BRITISH
Maj Gen Burgoyne
RIGHT WING – FRASER Brigade
Exhaustion 10 (moves after turn 2 on a 4-6)
Converged Light Inf 3-6
Converged Grenadiers 3-6shock
24th Foot 3-5
Light Inf & Brunswickers 2 x 1-5
Artillery 6/3 pdr 2-6 Field and 2-6 light
Indians 2 x 1-4
Loyalists/Tories 2 x 1-4
Canadians 1-4
(These last three deliberately out of command at Freeman’s Farm due to
poor command on the day, and their forward movements)
CENTRE – Hamilton Exhaustion 7
9th Foot 3-5
20th Foot 3-5
21st Foot 3-5
62nd Foot 3-5
Artillery 2-6 field
LEFT WING – RIEDESL Exhaustion 6
(moves after turn 2 on a 4-6)
Regt Riedesel 3-4
Regt Rhetz 3-4
Regt Specht 3-4
Artillery 2-6 field, 2-6 light
AMERICAN
Maj Gen Benedict Arnold (Gates’ command excluded from battle)
MORGAN Exhaustion 2
Morgan’s Riflemen 2 x 1-5
Dearborn’s Light Inf 2 x 1-5
Poor’s Infantry Bde - Exhaustion 9
1st New Hampshire 3-5
2nd NH 3-5
3rd NH 3-5
2nd New York 3-5
4th NY 3-5
Cook’s Militia 3-4m
Latimore’s Militia 3-4m
Learned’s Infantry Bde – Exhaution 5 (Turn 3 or thereafter on a 4-6…if
Gates is kind)
2nd Massachusetts 3-5
8th Mass. 3-5
9th Mass. 3-5
1st Canadians 3-4
Another great V&B game. We really must get a game of Sabre Squadron in now...


