Showing posts with label Marlburian. Show all posts

Sunday, 30 May 2021

Ramillies 1706 - 'actual'

 Having spent a week setting the thing up, finally got to play it...

This was a test of the new Field of Battle 3 rules, more than anything else, which are certainly  streamlined ( a few subtle changes - which speed up game-play - designer notes in rules refer to changes, with reasoning, which is great), but not so much that any revision detracts from the intent, the narrative and the game.

 I had mentioned to Steve in last post, that were a wargamer without experience to play FoB, before trying any other rules for horse & musket, I'd say they'd be hard pressed to wonder why more staid and 'modifer heavy' systems aren't more like FoB.  The system works, a great game is generated, and the rules are relatively straightforward, with each result making sense rather than becoming 'gamey' like other sets (BP...I'm lookin' at you).

At scale, Ramillies is a pretty big undertaking with 30+ units a side (roughly brigades in the game presented here - but battalions are easily handled too) - though that is the kind of thing which FoB does well, no matter how many players are involved.

There were some historical 'liberties' taken (as usual).  I also reduced units to 2 cavalry stands or 3 infantry stands, due to table width being 7 feet - though it still worked well - as period rules in FoB have 'linear units' for this setting, and units were roughly equivalent widths.

Looking from Taviers, toward Ramillies. A heavy cavalry presence on this flank.

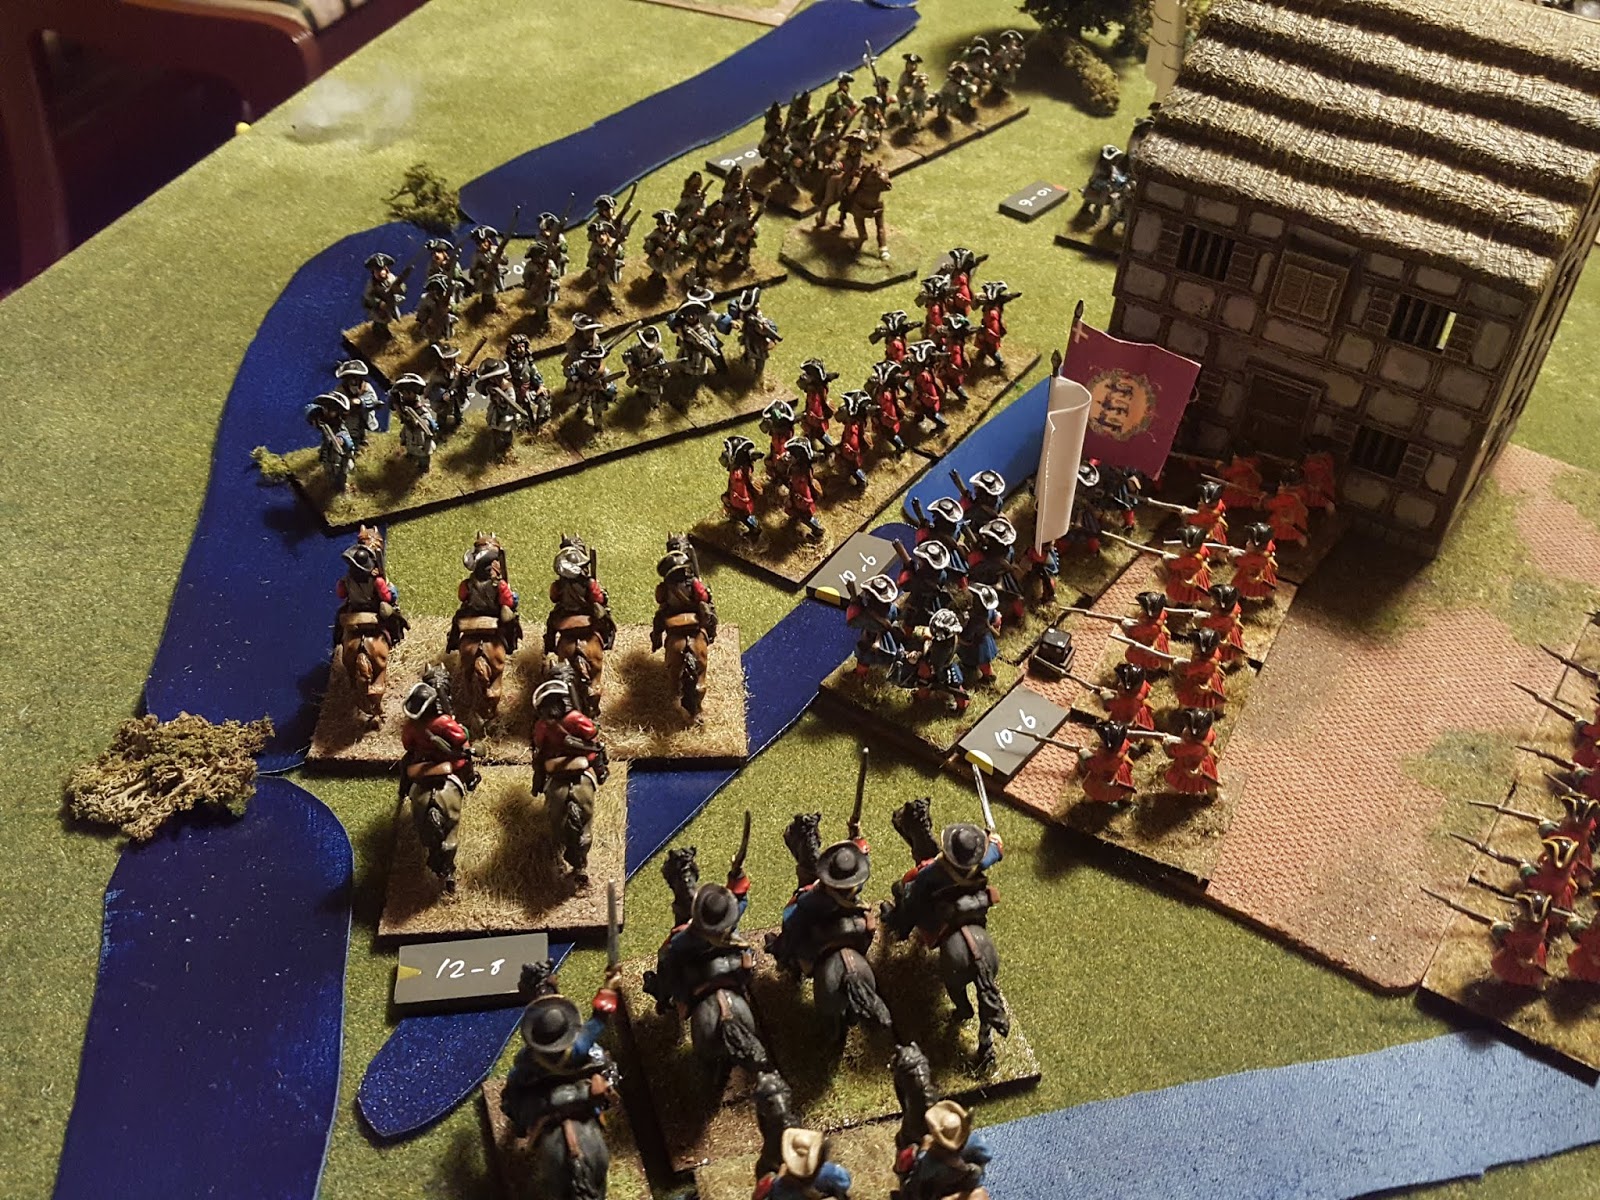
The French centre, which will see considerable action during the day.

Allied cavalry moving up on French left.

Early allied cavalry attacks are easily seen off by French musketry, though movement behind the main attack takes advantage of the French first fire having been used.

The Allied right, which sees forces develop for a later attack, holding the French in check through their expectation of having to secure the flank.

The centre - Allied attacks go in, with Danish troops facing the brunt of French musketry.


Villeroi co-ordinates movements in the centre - French defence in depth here.

Rapid attacks on the French left. Marlborough is d12+1 with Villeroi at d8 - which means that initiative invariably goes to the allies, but it does not all go their way.


The Allied centre is, at times, left dangerously open as they focus on flank actions.


British assault on the French guns in the centre, which, incredibly...actually works, despite horrific casualties.

'I'm outta here mate!!!'

'Huzzah!!!'


There are still plenty of French units in the centre however. It is clear that the Allies will find it a tough nut to crack. Have the French put too much emphasis on defending here however?

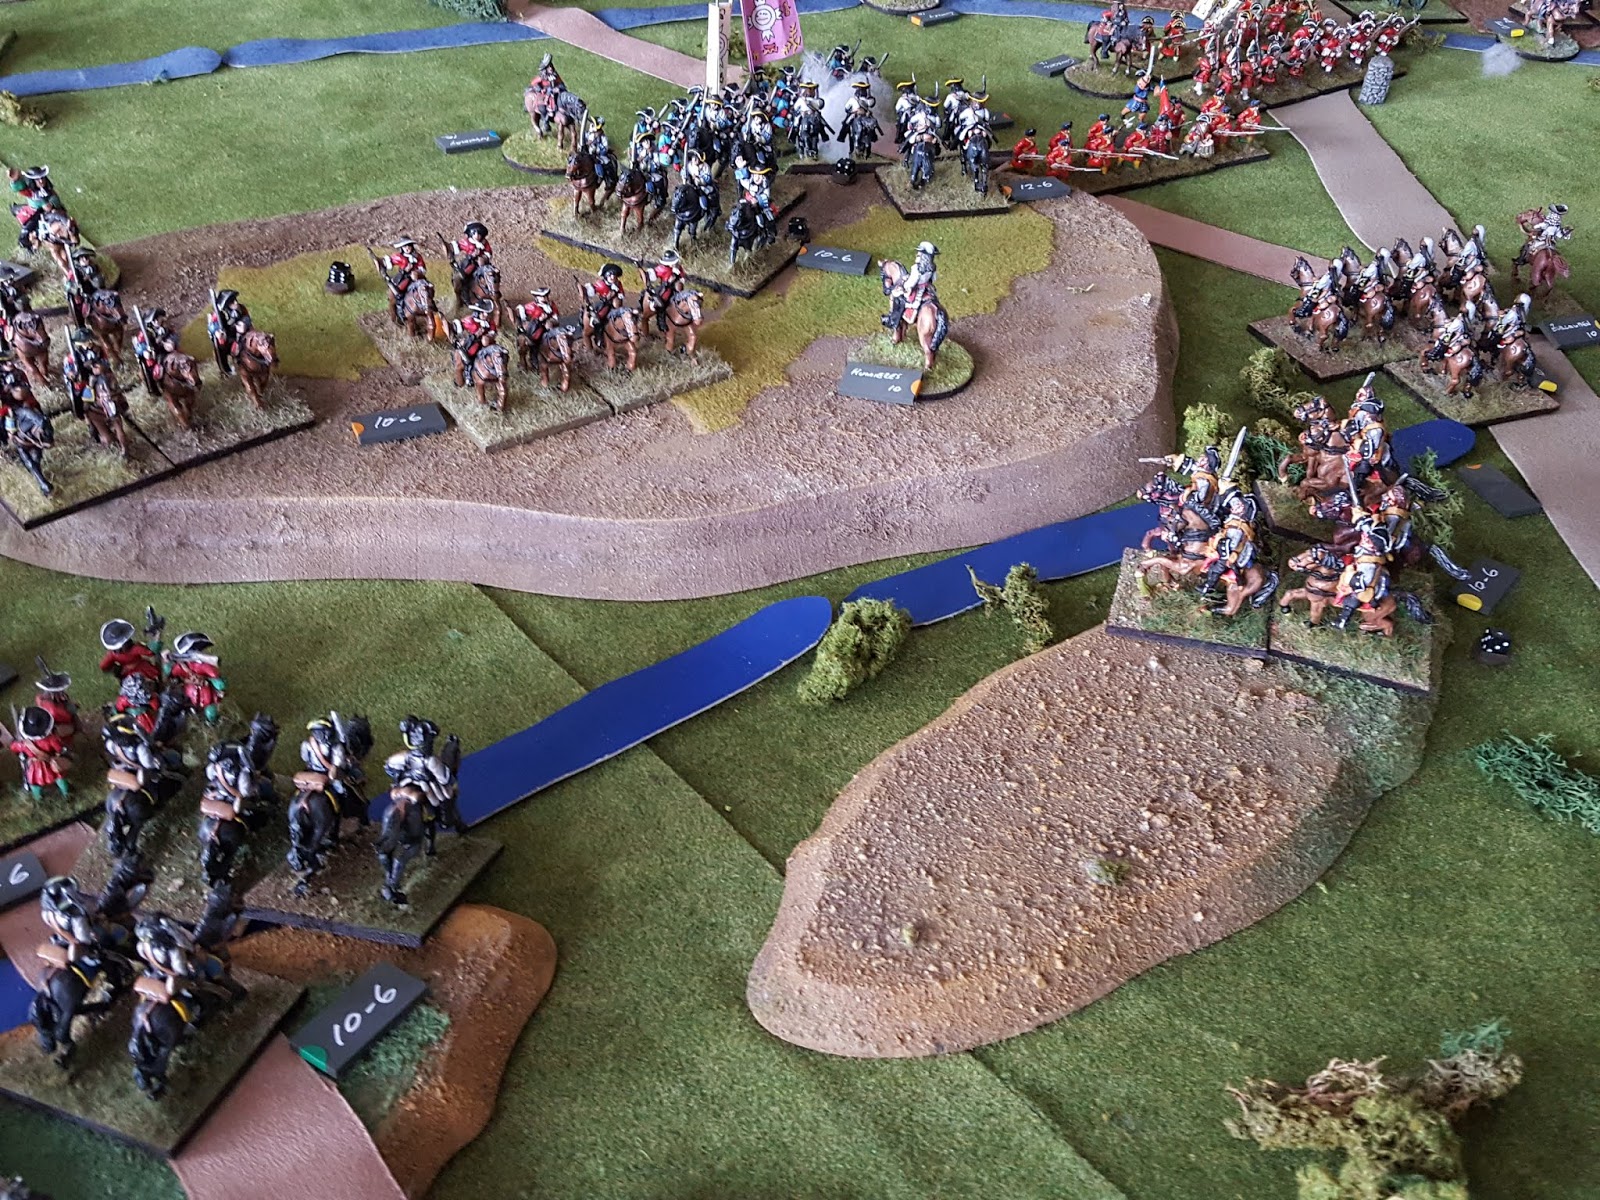
French cavalry start to make moves on the Allied right.

...as a foil to a massive (3 move) assault across the river and onto the far French left - attacking the guns and guard units there.


...accompanied by a massive cavalry attack on the Allied left.

Most of the battlefield - showing cavalry duels on Allied left, held centre, and dynamic right.


French cavalry pour toward the perceived threat at left.


...though a greater issue is developing on their right flank.

'Hello Padre...you look a bit Protestant to be on this side of the line??? ...could I show you a map perhaps?'

...fierce fighting in the centre.


On the French left, two commanders, Caramon and Bedmar, are shot from the saddle, placing their units 'out of command' and the French left into disarray.


...as if it could not get any worse - it never goes well, when the attacker rolls a 12 and the defender a 1 during melee - despite the advantages that line has against attacking cavalry...

...a gap on the French right - now exploited by waves of Allied infantry.

As morale is worn down, and a potential break point is reached...the first French roll against the Army Morale card results in failure. Villeroi withdraws from the field, and the day is Marlborough's.

Another great game with these superb rules. Must get another game in soon, as I was rusty with a few things, and some fine tuning on the new rules required.


Sunday, 23 May 2021

Ramillies 1706...nearly

Bearing in mind it was the anniversary of the Battle of Ramillies in 1706, I had made stringent efforts to get the table set up, and thereby enable 'first game' with the new (actually not new any more) version of 'Field of Battle' (III), with Marlburian hacks.

Of course, I got nowhere near being ready ...but here are some pics anyway.

There's always next week / month to get this one moving...


Soon ...soon...

Monday, 6 April 2020

Blenheim 1704 - with Field of Battle

With little excuse needed for a larger game, and with only a few sets of rules which suit the requisite level of scope and drama, it was full speed ahead with a game and a famous battle that I always wanted to do, but never thought I would have time for.

View from the French left at Lutzingen.

Marlborough's victory at Blenheim is his most famous, and probably is to the War of the Spanish Succession as Waterloo or Austerlitz is to the Napoleonic Wars; a defining moment for Europe and the Grand Alliance.

The scenario is taken from the Fire & Fury based Age of Honor Scenario book, with units (roughly) as large brigade size elements. Ranges are kept the same, but it wasn't too 'gamey'.

Command decks were Excellent vs Average.

I bet he drinks Carling Black Label...

As usual, FoB provides:
  • Unpredictable results: the centre was in jeopardy several times for both sides - thanks to the timing of events, orders, managing limited resources, and the ebb and flow of battle - uniquely handled through the card driven turn sequence and well designed mechanics of FoB.
  • An unfolding narrative akin to a real battle.
  • Abilty to handle a very large battle with 30+ units per side, and smaller engagements are just as exciting.
Da Boss!  ...he only changed sides once, well twice, well...it's complicated.
'Just tell the Missus, I have a French bloke in me coach ...oh yeah, and I got that kitchen unit from IKEA that she wanted...'
  • Looking from the west: Lutzingen, Oberglauheim, with Blenheim in the distance at top right - which would see some savage fighting during the day.

     The centre, which would also see heavy fighting, and much opportunity.

     Blenheim, overpopulated with French Brigades.

     The Allied position on their left, centred around Lord Cutts & Lumley.

     The centre, which was deceptively quiet at the start, but would become a crucible of maneuvre warfare.

     The Allied right, which would see a massive delaying action.


     Initial moves at Blenheim.

     Masses of French under Marsin & the Elector (this of course should be a name for an '80s ska band).


     The attack at Allied centre left takes many turns to get going. The French have much of the initiative early on, if they can just get a chance to capitalise upon it.


     Significant coordination required by the French on their over-populated flanks.

     Cavalry moves in the centre would define the battle.


     'Here they come mes amis!!!'


     Allied infantry smashes into Blenheim as units fall, rally, fall again.


     Things remain quiet on the Allied left, as a grand feint is underway.

     Gaps appear in the centre. The  first side to exploit it can win the battle.

     Allied units are rerouted to seal the gap.

     ...even as French cavalry is routed.


     ...and Allied troops scale the heights.

     Allied troops assault the guns at Lutzingen; despite early successes they are being outflanked.

  •  Lumley gets moving to exploit a breakthrough.


     The ill timed assault on the left will come to naught - but will bleed precious army morale points.
    'He'll have someone's eye out with that thing!!!'
    'It's a nice place to visit, but I wouldn't wanna live here!''


     The French try to sort out their left, which could become a battle winning proposition.


    'You're going the wrong bloody way chaps!'

     French infantry also rout from the high ground.

     As British cavalry takes it. But the victory is short lived.


     Allied cavalry slowly, slowly, skirts around their left at Blenheim.


     Blenheim defenders are not rolling well.
     Incredibly, French cavalry attack via a melee card (despite their lesser combat values reflecting reduced propensity to charge), and drive Allied cavalry off the centre.

     ...as the centre becomes a mess of cavalry charge and counter-charge, hitting both sides' army morale.

     'Pour La Gloire mes ami!'


     The Allied right flank bends, but does not break.

     Even as the French right is dangerously close to the Danube.


     Allied cavalry is charged in the rear, as the battle for the centre defines the battle.


     The Allies' turn to charge home.


     The Allies charge home in the centre, while refusing the flank, where the French have kept too much of their strength.

     Like cortical stacks from the sci-fi show Altered Carbon, chips from dead units litter the table. (That's a pretty strained reference, I know).

     Allied breakthrough on the flank.

     ...and in the centre.

     ...whilst yielding ground on the right...

     ...ultimately proves successful. Despite the Allies being close to Army Morale level, the French reached theirs first, and soon drew an Army Morale check, which they failed. The French army withdraws...


    'Found me fleg at last like...'
'It's all his fault!'

 A great game with a superb set of rules.