Very happy to report today, that traditional style hex'n'chit games are very much alive, their precepts in fact, being used successfully during the pandemic to encourage 2 metre / 6 ft social distancing via hex management... I caught this pic on a news website (accidentally).
Example of Play
In the picture above, Student 2 has Student 1 and 3 in his Zone of Control - thereby putting him out of supply, before they make a 2:1 attack with column shift in their attack phase.
He nervously awaits a flank attack from Student 4 in the advancing fire phase.
Of course, 'over-stacking' is only permitted with members of the same household.
You'll note the absence of Attack / Defend / Move ratings. This issue will be resolved in the second edition reprint.
So, Steve over at Sound Officers' Call, has been tinkering with Neil Thomas's Napoleonic Rules, in order to develop an AWI variant.
'Hold the line boys!'
His changes sounded really interesting for the Revolution, so I set up a quick game.
Steve's changes:
British Drill: no first stand loss morale check (this becomes VERY important and is very representative of what we read).
No free turns or pivots for Continentals (again, makes sense)
Morale Checks for chargers/chargees - this is very akin to what we read about in AWI battles, the effects are so realistic - and with simple, yet accurate, mechanics.
Rally & Commanders - can rally off hits (I didn't use this enough in the game - though it is both accurate and critical to gameplay).
A few things I threw in:
Light infantry can get cover saves in the open - although this does give them a little too much staying power potentially. An alternative might be to reduce their number of bases.
Militia find it harder to both hit and stand - a simple change like this can be readily instituted via making a 4-6 success of the D6 a 5-6 instead. It does make the militia a bit poor unless they are behind a fence (with cover saves) - but that seems fine.
General:
The turn sequence - charge, move, shoot etc. remains relatively
unchanged, but for an IGOUGO system, it flows smoothly with a lot of
action. Again, so good for a very large game, or as a battle mechanic for a campaign.
With a system based around stands/degrading hit points, it's also very reminiscent of the 'Pike and Shot' computer game, with attritional style warfare, if you resort to musketry, but still retaining the ability to move and surprise the opponent for a canny general.
Now, it was a short game, but to me, that exhibits the excellent potential for something larger like Germantown (Steve working on) or Monmouth, or as way of fighting the multiple battles of a larger undertaking; testament to both the NT rules, and their ability to be easily 'hacked' to make them what you want.
Also of course, is the fact that saving throws are only used practically (i.e. in cover, or in my instance for light infantry). We see this in sensible rules like Volley and Bayonet too, as well as NT. In the SlackChowder for instance, they are out of control and used like Warhammer... (y'all knew I had to get a BP crack in, right?)
There were 7 units a side - the Americans had the edge in terms of defences, while the British had some advantages in light infantry and staying power.
The fence would grant a saving throw due to cover, unlike BP, where a saving throw means something very different.
(The publishers of Slack Chowder defend their Saving Throw mechanic...)
On the American left, the continentals were deployed in force.
On the right, a cavalry clash would move back and forth, with varying degrees of morale roll success dictating the play.
Big advantages using Generals for rallying here - but next time.
I didn't give any bonus to British firepower, but perhaps something worth thinking about...though the morale benefits they receive are quite influential.
The Continentals did get some luck in terms of morale.
German Jaegers move on the flank of the cavalry clash.
British guards will also charge the rail-fence. That is not going to end well...
A small engagement, with a flank ready to crumble...
The British horse breaks the American cavalry, allowing a flanking action.
...a developing crisis in the centre.
With hand to hand threatening to completely derail the fragile militia, the end is not in doubt...
'Wait 'til you see the whites of their eyes...'
Morale is not something which the militia can be relied upon to hold onto...
A great game, and a lot of takeaways which have me thinking re. rapid setup and large battles, and/or campaign battle rules.
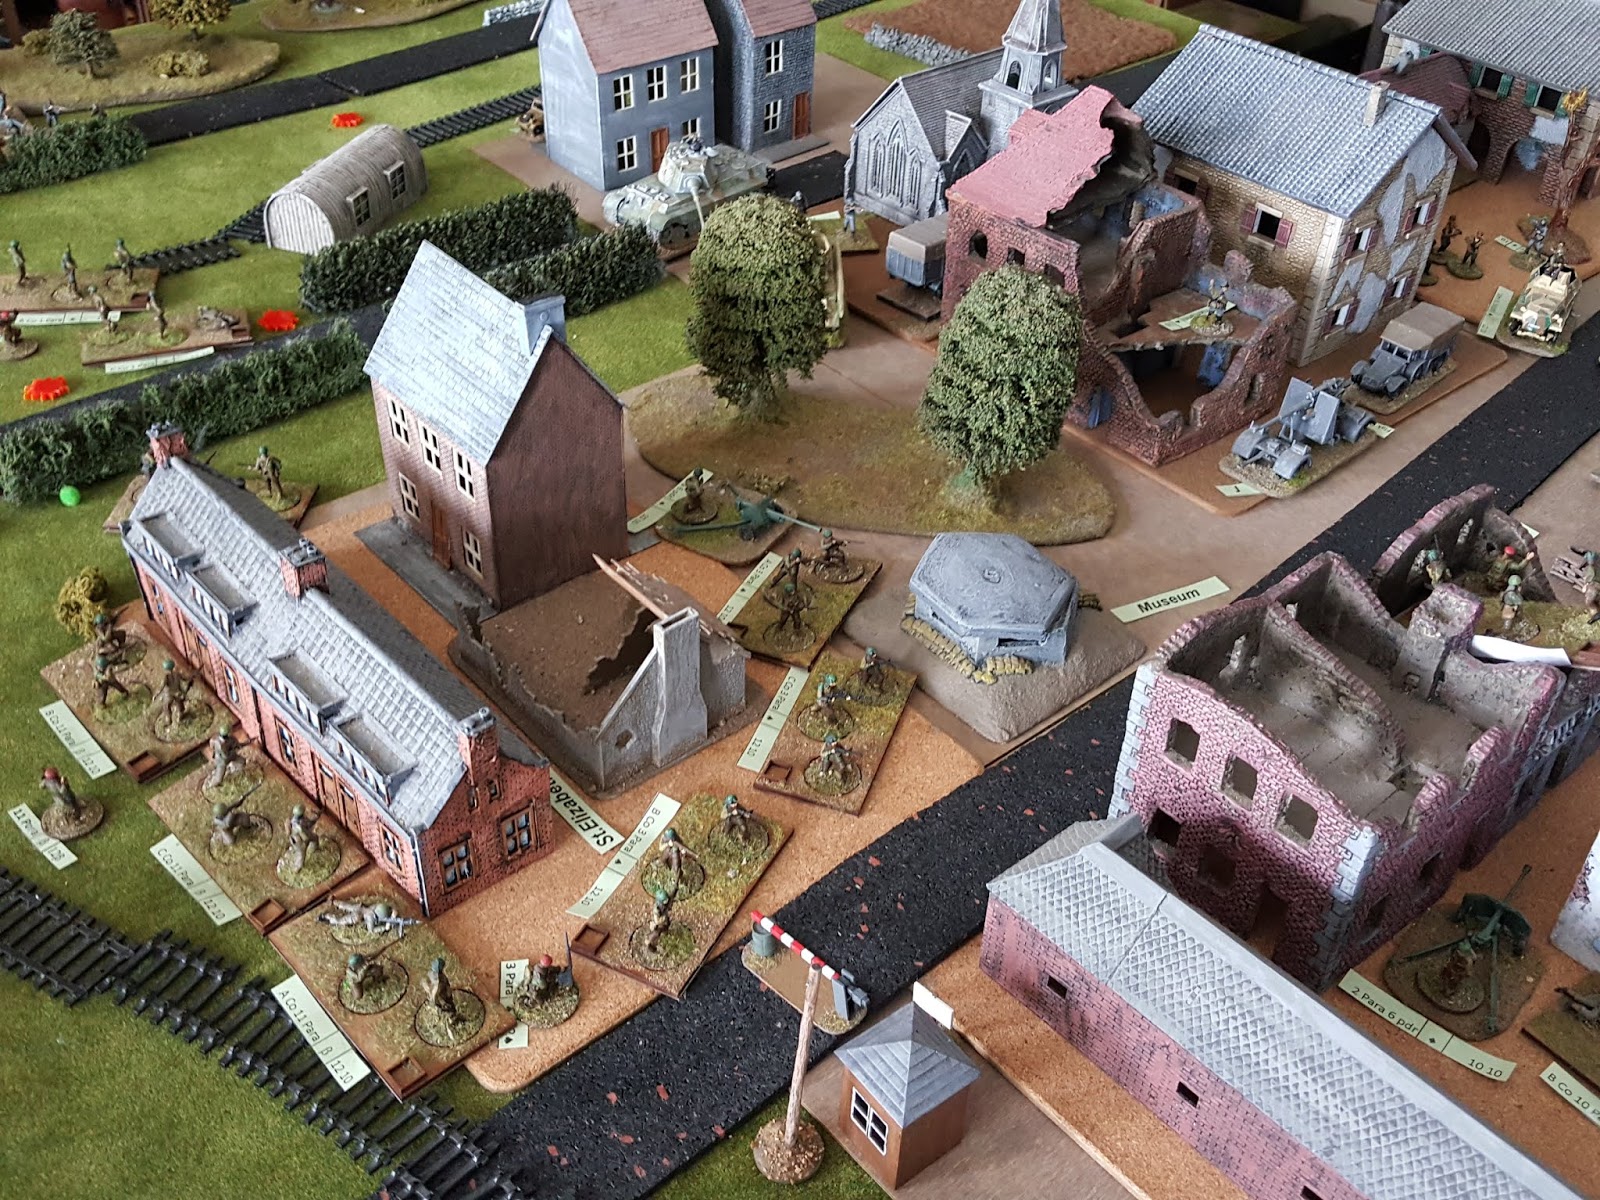
The situation after day 2, was that 2 Para's tenuous hold on Arnhem bridge was being reinforced by 10 Para, and other units which had broken through to Arnhem, though German armour was vey much in evidence.
In the day 2 night turn, both sides consolidated their positions.
One worrying concern for the Germans however, was that their Army Morale had taken a more significant hit than that of the Paras, due to repeated close attacks in Arnhem itself. This would prove to be pivotal.
The Germans were, despite their advantage in day 2, on the 'back foot' during day 3, with the 'Red Devils' continually winning initiative, creating blocking positions (which is what the Germans should have been doing), and generally creating good bases of fire within the built up areas of Arnhem.
By day 4, a decision was forced upon the Germans by virtue of the amount of hits they had taken, and its requisite effect upon army morale.
Day 2, despite its relative success, had in fact been hard on the German forces, while day 3 allowed the Paras to outmaneuver, and essentially outfight, their tough opponent.
Just before dawn on September 19th, 1 Para tries to establish some modicum of defence against the Panzers.
...while 11 Para have made good progress and re-established their positions at the outskirts of Arnhem. Already, this is a dangerous concern for the German forces.
German units still have a chance to threaten 2 Para's positions at the bridge, however the British troops have been reinforced.
German reinforcements threaten troops at Wolfheze and the landing zones too.
...while reinforcements north of Arnhem create ever growing concern for the British.
It looks bleak ...German Armour now threaten Arnhem, while infantry create a blocking to line to try and prevent British reinforcement.
...even 9th SS have still some units left intact.
But ...a large degree of Paratroopers remain in good order.
...as they close to the bridge, with several good initiative rolls.
...even fighting off some German armour, at least for a time.
They are however, being heavily reinforced.
...and making renewed attacks on the bridge itself, thereby supporting 2 and 10 Para.
An attack north of Arnhem helps to upset German plans.
...and the Paras see renewed success at the bridge.
KOSB at the Gasworks.
Limited AT sees some action.
The Paras expand their perimeter, taking advantage of excellent movement rolls, and good morale.
...even as German snipers take out 1 Para's commander.
Fighting continues at the bridge, but the Germans are stymied again and again.
...counterattacking with reinforcements north of Arnhem.
Poles arrive at the landing zones, which remain uncontested.
Early on day 4, the Paratroopers are in a position to consolidate, while the Germans have taken severe losses.
Wren their third morale check (almost in a row) comes up, it's a foregone conclusion. The German units, beaten and battered, opt to pull back from the river in the hopes of maintaining a defence of sorts north of Arnhem.
Able therefore to maintain a defence through the day, the arrival of XXX Corps at the bridge is heralded with cheers!
A superb game as ever with a dynamic, narrative, mechanically superior and highly fluid ruleset.
For the battle and campaign, I have seen few better than this one from TIK history; recommended.
It might actually change a few perspectives...