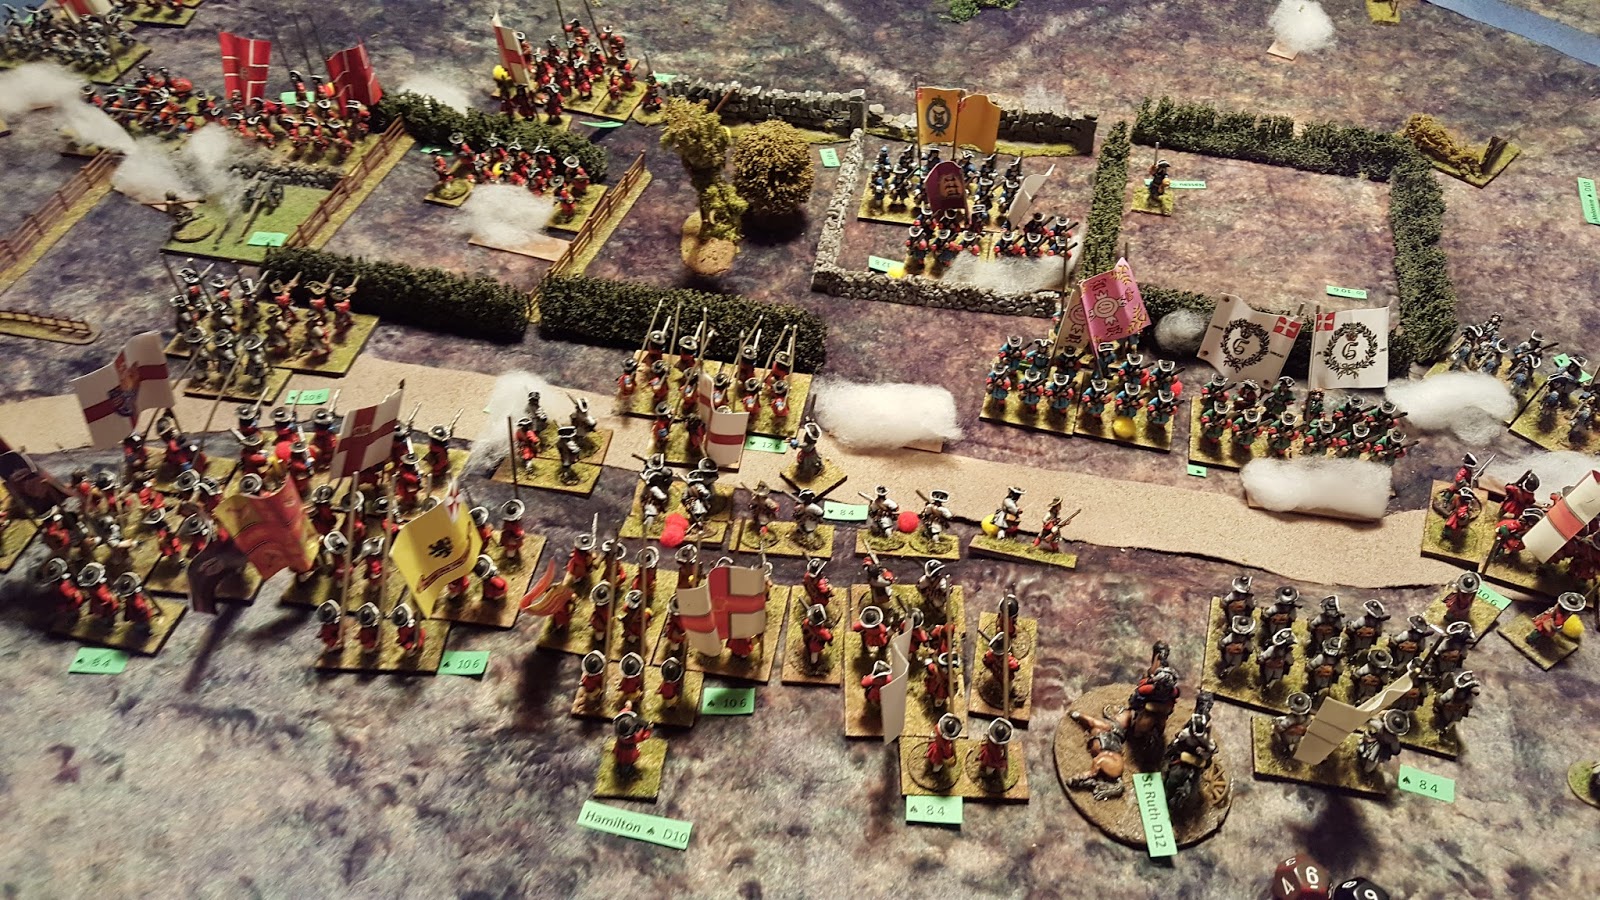
Sunday, 26 November 2017

Aughrim 1691

Another successful game with 'Field of Battle'.


Now I have extolled the virtues of these rules ad nauseum before, but I especially like the fact that what we read about in battle accounts seems to fall readily into the narrative generated by virtue of using them.


My favourite account of this battle comes from G.A.Hayes McCoy in 'Irish Battles: A Military History of Ireland', and he had written extensively on the battle in the 20th century.

Re-reading this, there were a few phrases that stuck with me, and I found myself explaining accounts through the rules mechanics:

'The boggy ground...proved a serious obstacle ...and forced him to confine operations to the two wings'.
(Any troops in the bog were 'out of command' - down dice for firing, down movement etc - a real pain in the allied centre)

'They had not been under unified control; indeed, some of their commanders had exceeded orders.'
We saw this in detail when some commanders rolled better on move cards, and surged forward, leaving flanks open, rather than conserving linear mass.

 'Sheldon and Luttrell, should have intervened to the full extent of their ability to hold Mackay back.'
In the game they held back - inactive for the most part, wary of a flanking cavalry charge across the bridge, after the 'special event' card decreed that the dragoons at Aughrim Castle had run out of ammunition.

'(General) St Ruth was decapitated by a cannonball.'
Any brigade commanders whose troops are in contact, or who rally, are subject to risk under the Army Morale card. a 1 in 12 in rules as written, though 1 in 20 is normally used. A different frontline personality was killed below - which put all troops in the first line out of command, until the next leadership card - and allowed the Williamites to make defining and swift gains, even as it looked as if they would be pushed back in the centre.


I guess we could make these points with any ruleset, though they seem very pertinent here. The only anomaly, and it's one that faces many 'tactical' non campaign games, is that Sarsfield's inaction in the real battle (in theory on the Jacobite right - though be careful when quoting this) could have been a direct result of his wanting to keep the avenues of escape open, such that much of the army could be saved if things went awry (see Hayes McCoy). In the confrontation below, that wasn't such a consideration (though I imagine that wargamers in a campaign game might scarcely come to blows in an effort to protect their armies - perhaps something for future consideration).


The Allied/Williamite left, showing the empty bog area, and Tristaun Bridge, which would be hotly contested, and the cavalry at the Pass of Urraghry.


Dragoons surge across on the Allied left.

Artillery action. What will become a deadly fire is evident from the 'Bloody Hollow' already.

On the Allied right, artillery beats at Aughrim Castle, with little effect.

Danes surge forward, getting caught (and put out of command) in the bog.


Tentative movements on the right against the castle.

Gains on the Allied left, allow some movement, and an effective 'beachhead' is made. This would prove decisive, and had the Jacobites locked this down early (and committed additional dragoons) the story would have been very different.

Hugenots and Danes trying to get out of the bog, manage to push skirmishers back from their cover.

Troops converge on the 'Bloody Hollow', which will devastate the infantry.

English / Irish moves on the Jacobite left, the bog takes no prisoners.

The Jacobites reinforce the right/centre, as the Allies move, inch by confounded inch.


Jacobite dragoons, short of reinforcements, break on the right.

...while English troops devolve into musketry on the opposite flank.


Cannon at the Bloody Hollow, ply their awful trade, routing two units, which though rallied later, will not re-enter the fray.


The right stalls. Dragoons at the castle and the threat of Jacobite cavalry (which historically were re-routed to the opposite flank, and perhaps could have made gains here) remains 'wathcing the enemy'.

'They're coming!'

Allied horse, gaining a massive run of cards, is able to cross and form, with poor response from the (fired) artillery and local musketry. This is very dangerous.


The flank bends.

Bloody murder is done at the edge of the enclosures, as units fall back, rally, re-engage.

In the action, General Dorrington, commanding the Jacobite first line, is killed. The Jacobite defence is stalled.

The ground is littered with...'out of command' tokens.

Too much pressure on the guns, and cavalry now free of the bog, threatens the flank. Sarsfield MUST commit the cavalry reserve, or all will be lost.

The 'Special Event' card comes up for the second time (after re-shuffle). As if the Jacobite luck couldn't get any worse, as dragoons at the castle find that they have been supplied with the wrong calibre of musket ball (you can find the local historical 'conspiracy theories' on line...I'm sure no no one was paid off ;)  )


Sarsfield commits the reserve flank cavalry to the battle. He may have the edge, if there is room to maneuvre.

On the left, Sheldon commits cavalry against pike - in the hope that the Jacobite ill luck might change.

The Allied centre is actually dangerously weak, though they have made gains after Dorrington's untimely demise.

Sparrow Cam...

Sheldon has exposed his flank on the left, misjudging the terrain perhaps...

The right becomes a desperate struggle.

Allied cavalry surge through on the Jacobite left now.

The Jacobite second line remains uncommitted. 'Now's your time lads!....Lads?'

The effect of destroyed units on the Jacobite right, and Sarsfield's desperate defence, means that the area empties rapidly. The Williamites have been able to absorb the Army Morale reduction, the Jacobites however have taken too many hits...

...the Army Morale card/check comes up. It's all over, as St Ruth orders a retreat.

In the end...the Jacobite right was weakened, and no gains could be made.

The centre was strong, and one push from Hamilton's second line could have ended the Williamite attack. They just ran out of time.

The left was looking dangerously suspect, with Allied cavalry incursion.


Great game with a great set of rules. In terms of narrative, these rules tell their own story. What else could we ask for. The card mechanic very much helps, and makes things very unpredictable. It pays to do as much as you can with the luck you are dealt. Not something we always see well outlined in rulesets.


Monday, 30 October 2017

Setting up for Aughrim


I'd mentioned a Battle of Aughrim game in passing in recent weeks. Having to get back to this when I can, but did get a cigar box battles mat to represent the boggy ground, and deep cut studios river to represent the bog itself. The colours are quite contrasting, and the light is artificial for the pics, but it might work.


View from the village


View from Urraghry Hill toward Kilcommadan Hill


Some roads and rivers still to add...
Rules used will be Field of Battle, of course...

(I might use daylight for pics next time.)


Sunday, 8 October 2017

Market Garden Sampler

I've had the Mercury/Market Garden hex'n'chit boardgame for a while, and it in fact was purchased with a view to getting something on the tabletop with miniatures.

Dispositions at the start - watch the 'club route'.

Uncannily, it does have the exact number of hexes, width vs length, that fit both the size of my table and the the number and size of large (120mm) hexes that I own.

That said, we wanted to at least try the game out, before we plunder it for unit counter markers for the miniatures game (Mercury/Crete is also featured and does look very interesting too).


Key things from a game of this size:
  • Abstraction...Abstraction...Abstraction: Artillery is subsumed; armour benefits control ZOCs rather than promote breakthroughs; supply becomes critical - as well as access to dropzones.
  • You begin to think about supporting large attacks, while holding off more maneuverable elements. By the same token, your opponent is utilising the advantages of built up real estate and blowing bridges in order to slow your advance with regard to reinforcements.
  • Airborne forces are fragile if unsupported.
  • Catered for are areas such as: armour moving around ZOCs unless impinged by other armour; timely reappearance of German Battlegroups; the ability to wear down defensive units in towns - though at cost, and over a period of days.
  • Nijmegan...it was Nijmegan...

These are obvious points, though this game, and of necessity any miniature version of same, will require the same results and strategic though brought about by the turn mechanism and mechanics, if it is to succeed.

I'm still very keen to look at Bob Cordery's Hexblitz and the Portable Wargame as solutions here - especially so with regard to difficulties in breaking prepared positions, the amount of troops thereby required and the fog of war built into the turn mechanisms.


The British airborne could not make it into Arnhem and sustained considerable losses even trying, then were caught in the open.

The 101st kept the road open. German attentions were focused on the crucible that Nijmegan was fast becoming.

The 82nd are hard pressed, as German Kampfgruppe and reinforcements focus on cutting the road here.


 Nijmegan and Arnhem become the focus for bolstering German defences...though XXX Corps is coming.


 In the end, Nijmegan became a siege of sorts, until eventually the German position, cracked and was flanked, though the airborne elements had been pounded by then.

A nice game, and gives a decent appreciation of the importance of certain segments and routes on the battlefield...and certainly gives us food for thought for a miniatures version at the same scale.


Sunday, 24 September 2017

Command and Colours; Tricorne, the American Revolution - Monmouth 1778

Most of our C&C experience is actually with Battlelore, and the first thing to say about the Tricorne version, is that there are multiple card decks, and a lot of variation between modifiers and units.

I had however backed the Tricorne game in Kickstarter.

Experience with the system and/or a decent Quick Reference Sheet would be a real boon here.

For instance:
  • There are multiple advantages in having a leader in the hex.
  • There are bonuses in having a full strength unit.
  • There are multiple bonuses through using the cards - in addition, there are Combat cards, which you can throw in in any amount, in addition to the standard command card. 
  • The right number of dice are critical in the rules, as flags and rallying can eliminate units much more quickly than hits. In fact, it's the first time in a C&C game, that I was looking for flags (both in terms of inflicting and rallying from) rather than straight hits.

  • This does add a separate level of complexity, and is made all the harder if for instance this was your first C&C experience.
  • The purity of C&C is a little diluted with a more complexity and adds, but it's probably just an experience thing.  I found myself thinking that the level of abstraction which the cards grant in Battlelore for instance, is lost a little here since there is a bit more book flipping and checking mods. I wondered half way through the battle, if this were affecting the narrative unduly, and whether in fact, Field of Battle would have given a better game. BUT that's probably just a lack of particular knowledge with the rules.
  • In addition, rolling flags not only pushes the unit back, but forces a morale check/rally. This can force the unit to leave the field, and is quite jarring if you're not ready for it.
  • There are also major advantages to keeping units in line, and/or adjacent in terms of manipulating card results and the amount of units that can fire across sectors. A nice change, and so applicable for the period.

Having  said that, matters are still very close and decisive (we had 9 victory points vs 8 in the end).

The initial setup - heavy British presence on their right, with some American threats on their left.


Movement on the American right, taking advantage of some early Combat cards.

 A move to the right, with leader activation off the Combat card, can lead to some devastating results.


American attacks on the British right, would prove ill founded.

 ...while the British left would see some success.

Pushbacks in the centre. Have I mentioned devastating 'flag' results from the dice?

Highlanders make a dash for the centre after weakening the American line.
   
 The Americans hold the centre...

 ...while their right crumbles, but at great cost to the British elite units.


 At game end, turns are summarised in terms the number of units traded. In the end, the Americans win by a single victory point. In essence, the Americans simply held their line in the face of British attacks.

Saturday, 9 September 2017

Zorndorf 1758, with Field of Battle...at Sgt Steiner's

Another great game of Field of Battle at Sgt Steiner's.

These rules are truly under-represented in the wargaming sphere. Every game is a large affair, a great narrative, and a logical conclusion in a reasonable time - with lots of figures and excitement, and multiple players. These are so much better than a lot of what's out there (I'm lookin' at you Slack Chowder). Buy them from Brent!


The rules are logical, reward historical thought and action, yet slap you in the face with battlefield chaos which you then have to manage - and it's the type of unpredictability you read in a battlefield account. Great game, with elegant dice mechanisms and wonderful card based turn sequence.

 Oh yes - the dice gods were VERY DEFINITELY with me today. Gawd bless Stephen..Gawd bless 'im. 

 The Russian lines - heavy in the centre and determined in defence, with deadly artillery.

 The Prussian force is small yet deadly in terms of musketry (C10,12) with advantages in movement (and ability to oblique, mimicking cadence step and Prussian drill etc).

Strengthened right flank...a taste of what was coming.

 
 The Prussian centre was weakened and started to take a battering, yet managed to hold the Russian centre in place.


A lot of action on the Prussian right, where a number of 'excellent' dice rolls were made (have I mentioned the dice gods?)

The reserve in the centre commits - also to the right. if this goes wrong...  :(


Plans for the Russians go awry on their left, as the flank is under threat.


Routed units being brought back into the fray.

 Fighting around the river and flank.


Vicious melee and musketry in the centre;

 ...the flank bends, bows and breaks - an army morale roll convinces the Russians that staying is not a good idea.

Great game, great hospitality as usual ...have I mentioned the dice gods?