The situation after day 2, was that 2 Para's tenuous hold on Arnhem bridge was being reinforced by 10 Para, and other units which had broken through to Arnhem, though German armour was vey much in evidence.
In the day 2 night turn, both sides consolidated their positions.
One worrying concern for the Germans however, was that their Army Morale had taken a more significant hit than that of the Paras, due to repeated close attacks in Arnhem itself. This would prove to be pivotal.
The Germans were, despite their advantage in day 2, on the 'back foot' during day 3, with the 'Red Devils' continually winning initiative, creating blocking positions (which is what the Germans should have been doing), and generally creating good bases of fire within the built up areas of Arnhem.
By day 4, a decision was forced upon the Germans by virtue of the amount of hits they had taken, and its requisite effect upon army morale.
Day 2, despite its relative success, had in fact been hard on the German forces, while day 3 allowed the Paras to outmaneuver, and essentially outfight, their tough opponent.
Just before dawn on September 19th, 1 Para tries to establish some modicum of defence against the Panzers.
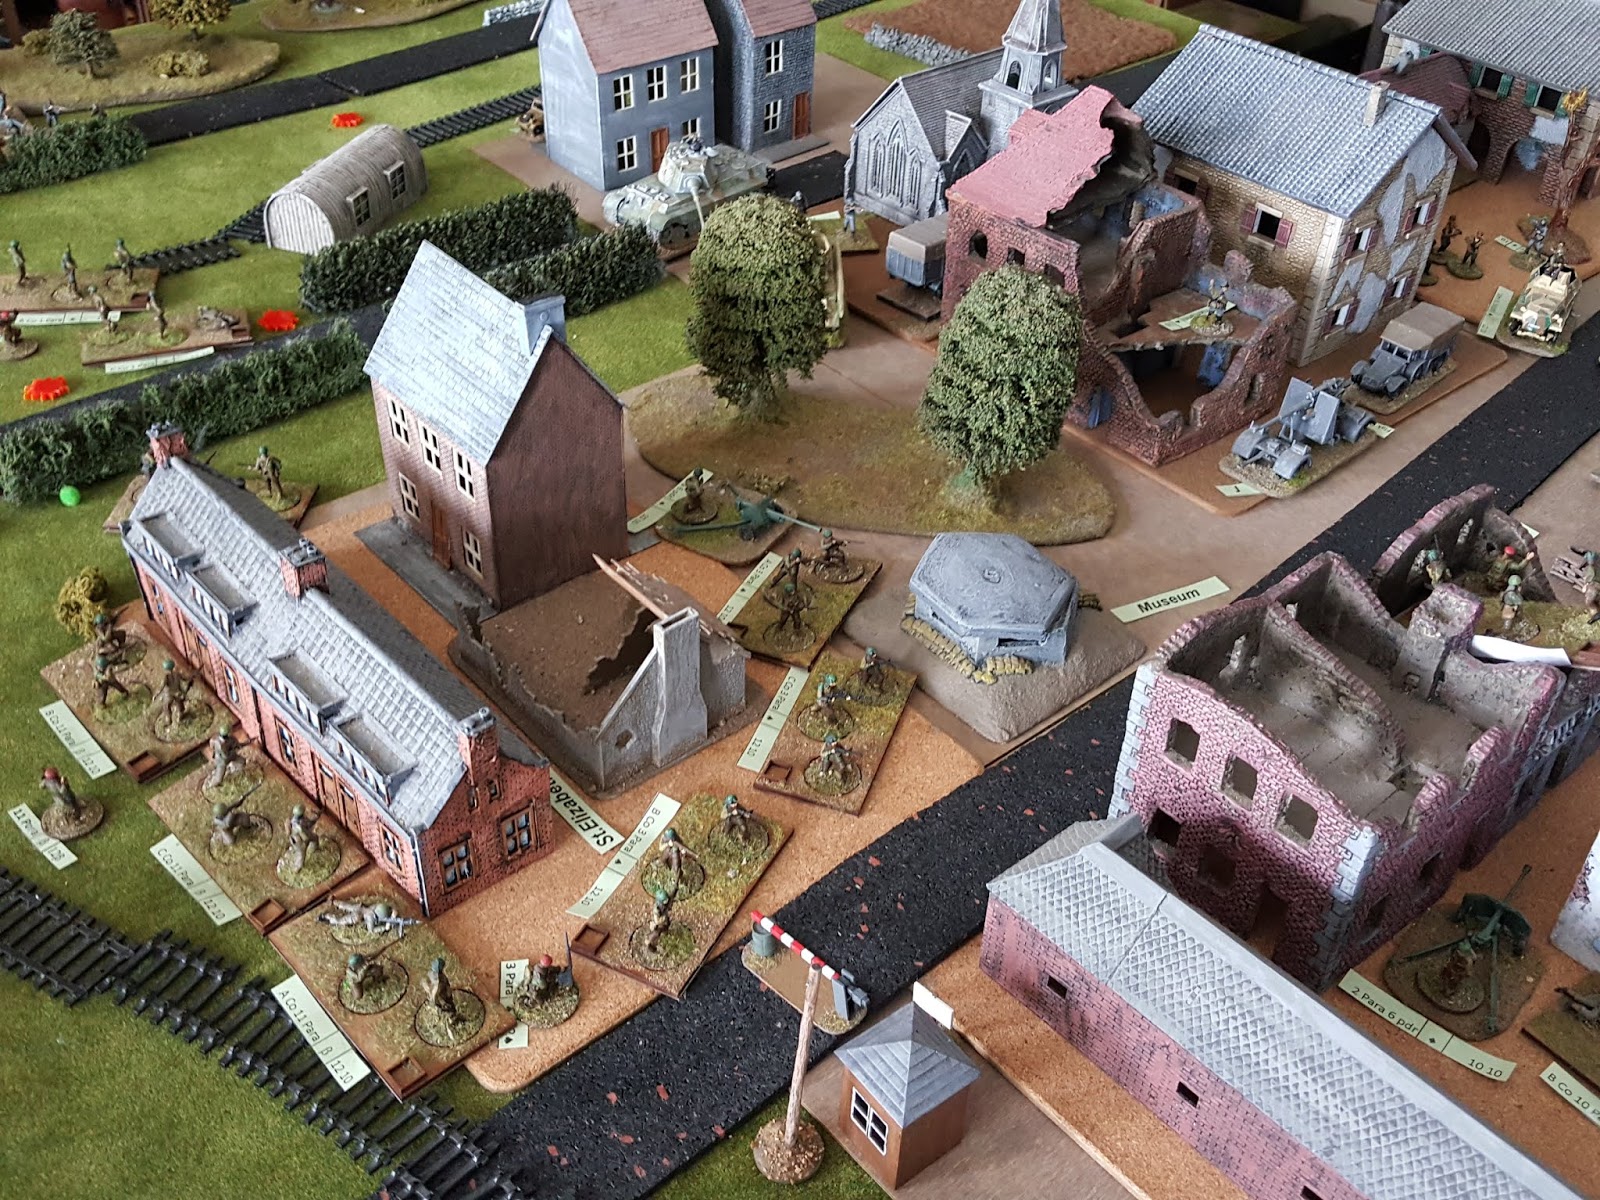
...while 11 Para have made good progress and re-established their positions at the outskirts of Arnhem. Already, this is a dangerous concern for the German forces.
German units still have a chance to threaten 2 Para's positions at the bridge, however the British troops have been reinforced.
German reinforcements threaten troops at Wolfheze and the landing zones too.
...while reinforcements north of Arnhem create ever growing concern for the British.
It looks bleak ...German Armour now threaten Arnhem, while infantry create a blocking to line to try and prevent British reinforcement.
...even 9th SS have still some units left intact.
But ...a large degree of Paratroopers remain in good order.
...as they close to the bridge, with several good initiative rolls.
...even fighting off some German armour, at least for a time.
They are however, being heavily reinforced.
...and making renewed attacks on the bridge itself, thereby supporting 2 and 10 Para.
An attack north of Arnhem helps to upset German plans.
...and the Paras see renewed success at the bridge.
KOSB at the Gasworks.
Limited AT sees some action.
The Paras expand their perimeter, taking advantage of excellent movement rolls, and good morale.
...even as German snipers take out 1 Para's commander.
Fighting continues at the bridge, but the Germans are stymied again and again.
...counterattacking with reinforcements north of Arnhem.
Poles arrive at the landing zones, which remain uncontested.
Early on day 4, the Paratroopers are in a position to consolidate, while the Germans have taken severe losses.
Wren their third morale check (almost in a row) comes up, it's a foregone conclusion. The German units, beaten and battered, opt to pull back from the river in the hopes of maintaining a defence of sorts north of Arnhem.
Able therefore to maintain a defence through the day, the arrival of XXX Corps at the bridge is heralded with cheers!
A superb game as ever with a dynamic, narrative, mechanically superior and highly fluid ruleset.
For the battle and campaign, I have seen few better than this one from TIK history; recommended.
It might actually change a few perspectives...
Wow!!! Just... wow!!! Sorry, Darren, I've been busy and missed when you posted Day 1 and 2, but I just read both posts, and that was a truly epic fight! Man, I've seen your 20mm toys before and always been impressed, but you really outdid yourself here! Your Arnhem setup is without peer, both troops and terrain.
I know I've said it before, but I'll say it again: you're making me need to get Field of Battle. If only I didn't have so many other projects going on. I'd never be able to live up to your example anyway! ;)
Thanks Jack, 20mm is what I've been collecting for WWII for about 40 years - more if you consider some early infantry from my childhood that is still in there - part of the Airfix generation. I know a lot of guys went 15mm in the last 20 years, but no way I could part with my 20mm. :) 20mm just screams WWII to a lot of people still.
My pleasure, a collection guaranteed to impress the pants off of anyone! And absolutely, I had my share of 1/72 troops, both Airfix and ESCI, they were the only thing my allowance went for. My issue regarding that is that I didn't begin wargaming until 2009, and I have no idea what happened to all those 1/72 troops after somewhere around 1988. I think maybe you ended up with them! ;)
Haha ...I wish Jack. They would certainly find a good home here. Speaking of which, I have your 1/300 Soviets on table right now for a modern game ...coming soon.
Heck, I figured as many as you had, you've been scooping them up from every conceivable source! ;)
I'm looking forward to some modern 1/300, working on some myself. You saw that photo where I'd finished the Soviets and West Germans; I've not finished the Americans and am working on Brits. Amongst other things ;)
Looking good Darren! You've been talking about a Market Garden campaign for a long time and I'm glad to see it on the table! Incredible looking setup, too. I'm envious!
Thanks Steve, Surprisingly, I've been tinkering with bits and pieces of this for years, so it was quick to setup. Taking down again - not so easy HA. I have so much 20mm kit - I didn't even realise - some of it is older then me...
Thanks Mike. This one has been a long time coming. It's a little epic when a solo game takes two days... and I miss an opponent (1) for the unpredictability - though these rules are VERY good for solo play and (2) I had to walk around that damned table so many times :)


Excellent with the best set of WW2 rules for this scale of game.
ReplyDeleteThanks. Less fiddle, more abstraction, but recognisable narrative results - works for me.
DeleteGreat report Duc, really enjoyable read and wonderful pics.
ReplyDeleteThanks Jack.
DeleteIt was certainly an unexpected result after days 2.
Thank you.
ReplyDeleteCheers Norm. The big battle scope worked better than I'd expected.
DeleteWow!!! Just... wow!!! Sorry, Darren, I've been busy and missed when you posted Day 1 and 2, but I just read both posts, and that was a truly epic fight! Man, I've seen your 20mm toys before and always been impressed, but you really outdid yourself here! Your Arnhem setup is without peer, both troops and terrain.
ReplyDeleteI know I've said it before, but I'll say it again: you're making me need to get Field of Battle. If only I didn't have so many other projects going on. I'd never be able to live up to your example anyway! ;)
V/R,
Jack
Thanks Jack,
Delete20mm is what I've been collecting for WWII for about 40 years - more if you consider some early infantry from my childhood that is still in there - part of the Airfix generation.
I know a lot of guys went 15mm in the last 20 years, but no way I could part with my 20mm. :)
20mm just screams WWII to a lot of people still.
Darren,
DeleteMy pleasure, a collection guaranteed to impress the pants off of anyone! And absolutely, I had my share of 1/72 troops, both Airfix and ESCI, they were the only thing my allowance went for. My issue regarding that is that I didn't begin wargaming until 2009, and I have no idea what happened to all those 1/72 troops after somewhere around 1988. I think maybe you ended up with them! ;)
V/R,
Jack
Haha ...I wish Jack. They would certainly find a good home here. Speaking of which, I have your 1/300 Soviets on table right now for a modern game ...coming soon.
DeleteHeck, I figured as many as you had, you've been scooping them up from every conceivable source! ;)
DeleteI'm looking forward to some modern 1/300, working on some myself. You saw that photo where I'd finished the Soviets and West Germans; I've not finished the Americans and am working on Brits. Amongst other things ;)
V/R,
Jack
Looking good Darren! You've been talking about a Market Garden campaign for a long time and I'm glad to see it on the table! Incredible looking setup, too. I'm envious!
ReplyDeleteThanks Steve,
DeleteSurprisingly, I've been tinkering with bits and pieces of this for years, so it was quick to setup. Taking down again - not so easy HA.
I have so much 20mm kit - I didn't even realise - some of it is older then me...
Another really good read and I am as ever green with envy looking at your table.
ReplyDeleteThanks mate. It's exciting putting up and playing ...took me all bloody day to take down again though :)
DeleteGripping AAR and absolutely splendid table. There’s so much eye candy in those pics! Great stuff Darren!
ReplyDeleteThanks Mike. This one has been a long time coming. It's a little epic when a solo game takes two days... and I miss an opponent (1) for the unpredictability - though these rules are VERY good for solo play and (2) I had to walk around that damned table so many times :)
DeleteBeautiful units and terrain, what a great looking game!
ReplyDeleteThanks Phil. It took a lot of time, and a game that I have always wanted to do, but worth it in the end.
DeleteBeen said above, worth saying again: fabulous set-up!
ReplyDelete